

Sick of finishing the main project and weaving in ends, then creating each flower and weaving in their ends, then attaching them to your project and then weaving in those ends...me too.
I came up with a way to add the flowers as you go! They can be placed randomly all over a project or in a row to form a nice border. The best part is how easy it is to do!
*For this example I am going to assume that the last row and current row are dc (double crochet)-adjust as necessary for hdc and sc*
When you are ready to place a flower instead of making a dc in the next stitch you will ch 2 and ss to the top of the space.
Not here:

Here:
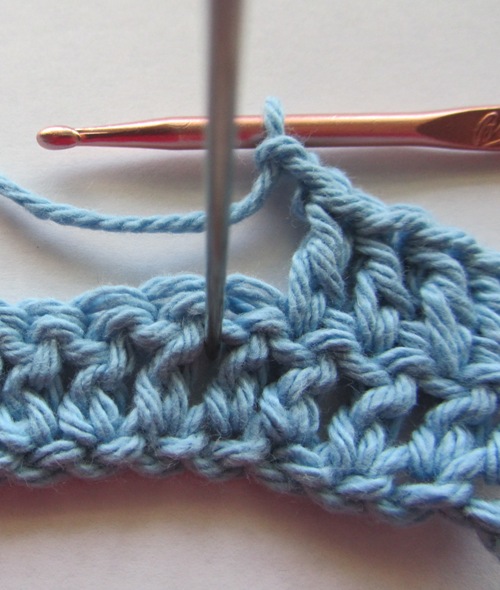
Put two sc in this spot and turn your work clockwise so that the dc post (that is directly to the left of the metal pointer in the above photo) becomes the top of your work, put three sc here.
Turn clockwise again so that the bottom of your work is now the top and work two sc, turn clockwise again and place three sc (the post of the dc that was to the right of the metal pointer), join with a ss to the first sc.


When finished join with a ss.
At this point you need to work your way behind the flower by ss in the back of the first two sc that formed the base of your flower. This puts you in a position to continue the pattern before you interrupted it with the flower. In our dc example you would need to ch 2 and continue your dc into the next stitch.
At this point you need to work your way behind the flower by ss in the back of the first two sc that formed the base of your flower. This puts you in a position to continue the pattern before you interrupted it with the flower. In our dc example you would need to ch 2 and continue your dc into the next stitch.
****NOTE : you started the flower by ch 2 and ss and to rejoin your progress you ch 2- so you will have an extra stitch- on the next row - dc those two chains together.
Really easier than I made it sound ;)
No comments:
Post a Comment